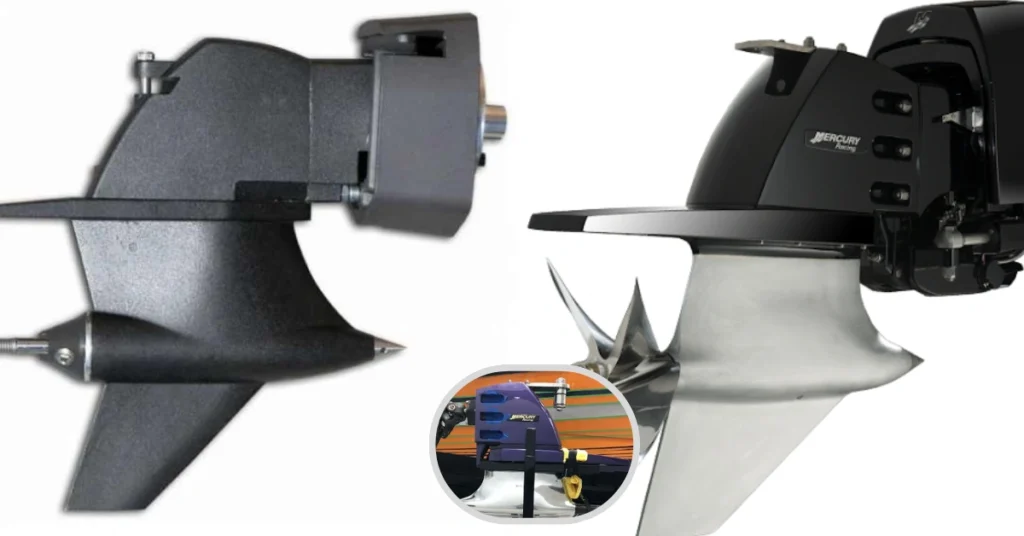
Introduction to the Nxt m Outdrive
Are you ready to take your boating experience to the next level? The Nxt m Outdrive is designed for performance, efficiency, and reliability on the water. Whether you’re a seasoned sailor or a weekend warrior, upgrading or installing this outdrive can enhance your vessel’s capabilities. In this guide, we’ll provide you with step-by-step instructions that will make the installation process seamless and enjoyable. With just a few tools and some handy tips, you’ll be able to transform your boat in no time! Let’s dive right into how you can set up the Nxt m Outdrive like a pro.
Tools and Materials Needed
When installing the Nxt m Outdrive, having the right tools is crucial for a smooth process. Start with basic hand tools like wrenches and sockets. These will help you tackle nuts and bolts efficiently.
Don’t forget a torque wrench to ensure proper fastening according to specifications. This tool prevents damage from over-tightening.
You’ll also need screwdrivers—both flathead and Phillips—to manage various screws throughout the installation.
Beyond hand tools, gather materials such as marine-grade sealant, gaskets, and lubricants. These components play vital roles in ensuring your outdrive operates flawlessly.
A sturdy work surface or stand makes handling easier while you install the Nxt m Outdrive. Safety gear like gloves and goggles should be on your checklist too; protecting yourself during this project is important.
With these tools and materials at hand, you’re set up for an efficient installation experience.
Step 1: Preparing the Boat for Installation
Before diving into the installation process of your Nxt m Outdrive, it’s crucial to prepare your boat properly. Start by ensuring that you have a clean and spacious workspace. This will make the entire procedure smoother.
Next, gather all necessary tools and materials nearby. Having everything at hand prevents unnecessary interruptions later in the process.
It’s also wise to inspect your boat thoroughly for any existing issues. Check for leaks or signs of wear around the transom area where the outdrive connects. Addressing these problems beforehand can save time down the line.
Ensure safety precautions are in place. Wear gloves and goggles as a protective measure against sharp edges or debris during installation tasks. A well-prepared setup sets up a successful outcome!
Step 2: Removing the Old Outdrive
Removing the old outdrive can seem daunting, but with the right approach, it becomes a manageable task. First, ensure that your boat is secure and stable. This will prevent any accidents during the removal process.
Locate and disconnect all electrical connections associated with the outdrive. Note their positions; labeling them can save time when you’re installing the new unit later on.
Next, detach any hydraulic lines carefully to avoid spills or damage. Have a container handy to catch any fluid that might leak out.
Use appropriate tools to unfasten mounting bolts from both sides of the transom assembly. A socket wrench typically works best for this job.
Once everything is disconnected, gently pull away from the hull while ensuring no components are stuck or caught in place. Take your time—this step sets up a smooth transition to your new Nxt m Outdrive installation!
Step 3: Installing the Nxt m Outdrive
With the old outdrive removed, it’s time to focus on installing your Nxt m Outdrive. Begin by ensuring all surfaces are clean and free from debris. A good fit is essential for optimal performance.
Carefully position the new outdrive onto the transom assembly. Align it with the pre-drilled mounting holes for a seamless installation process. It’s important to keep everything steady as you secure the unit in place.
Use bolts or screws provided in your kit to fasten the outdrive securely. Check that they’re tightened evenly; this will help prevent any misalignment issues later on.
Don’t forget to apply marine-grade sealant around joints where water might penetrate. This extra precaution helps protect against corrosion and keeps your boat running smoothly over time.
Take a moment to double-check alignment before moving forward, as this step can save you headaches down the road.
Step 4: Connecting and Securing All Components
Once the Nxt m Outdrive is in place, it’s time to connect all components. Start with the drive shaft. Ensure it fits snugly into the coupler and tighten any set screws securely.
Next, move on to electrical connections. Double-check that each wire is properly attached according to the manufacturer’s guide. Loose wiring can lead to performance issues down the line.
Don’t forget about your hydraulic lines if applicable. Make sure they are connected tightly without kinks or bends that could impede flow. Use hose clamps as needed for added security.
Take a moment to inspect everything you’ve installed. A thorough visual check can catch loose fittings or misplaced components before hitting the water. Ensuring everything is secure now saves headaches later when you’re out enjoying your boat.
Troubleshooting Tips
If you encounter issues with your Nxt m Outdrive, don’t panic. Start by checking the fluid levels. Low or contaminated oil can lead to performance problems.
Next, listen for unusual sounds during operation. Grinding noises may indicate a misalignment or wear in the gears. Addressing these early can save you from costly repairs later.
Inspect all connections and fittings as well. Loose bolts or corroded wires can create unexpected problems on the water. Tighten any loose components and replace damaged parts promptly.
If you’re experiencing steering difficulties, check for obstructions in the linkage system. Clear away debris that might be causing resistance.
Remember to keep your manual handy for specific troubleshooting steps related to your model of Nxt m Outdrive.
Maintenance and Care Instructions
To keep your Nxt m Outdrive performing at its best, regular maintenance is essential. Start by inspecting the outdrive for any signs of wear or damage after each use.
Clean the exterior thoroughly to remove salt, dirt, and debris. Saltwater can be particularly corrosive if left untreated. A gentle wash with fresh water will do wonders.
Check the oil levels monthly. Proper lubrication prevents overheating and ensures smooth operation. If you notice contamination in the oil, it’s time for a change.
Inspect all seals and gaskets regularly for leaks or cracks. Replacing damaged seals promptly will save you from costly repairs down the line.
Store your boat properly during off-seasons. Keeping it covered protects against environmental factors that could harm your outdrive components. Regular attention ensures longevity and reliability on every outing.
Conclusion
The Nxt m Outdrive installation is a rewarding project that enhances your boat’s performance and efficiency. Following this guide can simplify the process, making it accessible even for those with limited mechanical experience.
Thorough preparation is key to ensuring everything goes smoothly. With the right tools and materials, you can tackle each step confidently—from removing the old outdrive to installing the new one securely.
Remember, taking care of your Nxt m Outdrive after installation will prolong its life and maintain optimal functionality. Regular maintenance checks will help catch any potential issues early on.
Whether you’re an experienced boater or just getting started, mastering this installation opens up new possibilities for adventure on the water. Enjoy every moment spent exploring with your newly upgraded boat!
To explore more about cutting-edge digital solutions, check out our detailed guide on SkylightVoice.com.